SBSEdition

  • Subscribe to our RSS feed.
  • Twitter
  • StumbleUpon
  • Reddit
  • Facebook
  • Digg

Thursday, December 31, 2009

Cara Pasang Kotak Komentar Dibawah Postingan

Posted on 6:41 PM by Unknown
Cara Pasang Kotak Komentar Dibawah Postingan: "
Rival kali ini akan posting tentang Cara Pasang Kotak Komentar Dibawah Postingan.... mungkin semua sobat dah pada tahu gimana caranya...Rival posting ini atas permintaan sobat Rival...

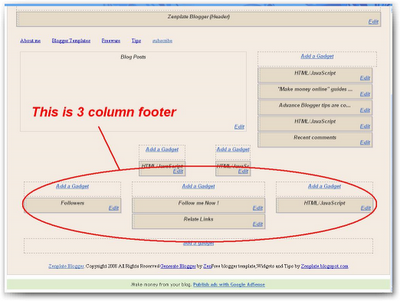
Apakah kotak komentar di blog sobat tidak muncul di bawah postingan sobat ? jika tidak muncul maka sobat perlu melakukan sedikit utak-atik pada HTML template sobat.Fungsi kotak komentar ini adalah agar pemgunjumg blog sobat dengan mudah untuk berkomentar di blog sobat karena pengunjung dapat melihat kotak komentar disetiap postingan sobat.soalnya ada sebagian template yang kotak komentarnya nggak muncul secara otomatis, terus gimana supaya kotak komentar pada template yang nggak muncul kotak komentarnya??

Cara supaya kotak komentar muncul di bawah postingan :

1-Log in ke account blogger sobat.
2-Click PENGATURAN--->KOMENTAR, pada halaman KOMENTAR ini cari tulisan Penempatan Formulir Komentar lihat contoh di bawah ini :

Centang kotak kecil DISEMAT DI BAWAH ENTRI.kemudian click SIMPAN SETELAN.
3-Nah jika sudah selesai kembali ke dashbord blogger dan click TATA LETAK--->EDIT HTML, jangan lupa centang kotak kecil EXPAND TEMPLATE WIDGET.
4-Cari code di bawah ini di dalam Template sobat :

<b:include data='post' name='comments'/>


5-Jika sudah ketemu copy pastekan kode di bawah ini tepat di bawah kode no 4 :
<b:include data='post' name='comment-form'/>


6-Jika sudah selesai click SIMPAN TEMPLATE.
7-Lihat hasilnya pasti kotak komentar muncul di bawah postingan sobat,seperti contoh di bawah ini :

Semoga tutorial yang Rival berikan bisa bermanfaat buat sobat... Selamat BerBlogger Ria..

PEACE
"
Read More
Posted in Cara Pasang | No comments

Friday, December 18, 2009

10 Blog Traffic Tips

Posted on 8:06 AM by Unknown
10 Blog Traffic Tips: "In every bloggers life comes a special day - the day they first launch a new blog. Now unless you went out and purchased someone else's blog chances are your blog launched with only one very loyal reader - you. Maybe a few days later you received a few hits when you told your sister, father, girlfriend and best friend about your new blog but that's about as far you went when it comes to finding readers.

Here are the top 10 techniques new bloggers can use to find readers. These are tips specifically for new bloggers, those people who have next-to-no audience at the moment and want to get the ball rolling.

It helps if you work on this list from top to bottom as each technique builds on the previous step to help you create momentum. Eventually once you establish enough momentum you gain what is called 'traction', which is a large enough audience base (about 500 readers a day is good) that you no longer have to work too hard on finding new readers. Instead your current loyal readers do the work for you through word of mouth.

Top 10 Tips


10. Write at least five major 'pillar' articles. A pillar article is a tutorial style article aimed to teach your audience something. Generally they are longer than 500 words and have lots of very practical tips or advice. This article you are currently reading could be considered a pillar article since it is very practical and a good 'how-to' lesson. This style of article has long term appeal, stays current (it isn't news or time dependent) and offers real value and insight. The more pillars you have on your blog the better.


9. Write one new blog post per day minimum. Not every post has to be a pillar, but you should work on getting those five pillars done at the same time as you keep your blog fresh with a daily news or short article style post. The important thing here is to demonstrate to first time visitors that your blog is updated all the time so they feel that if they come back tomorrow they will likely find something new. This causes them to bookmark your site or subscribe to your blog feed.

You don't have to produce one post per day all the time but it is important you do when your blog is brand new. Once you get traction you still need to keep the fresh content coming but your loyal audience will be more forgiving if you slow down to a few per week instead. The first few months are critical so the more content you can produce at this time the better.
 
8. Use a proper domain name. If you are serious about blogging be serious about what you call your blog. In order for people to easily spread the word about your blog you need a easily rememberable domain name. People often talk about blogs they like when they are speaking to friends in the real world (that's the offline world, you remember that place right?) so you need to make it easy for them to spread the word and pass on your URL. Try and get a .com if you can and focus on small easy to remember domains rather than worry about having the correct keywords (of course if you can get great keywords and easy to remember then you've done a good job!).
 

7. Start commenting on other blogs. Once you have your pillar articles and your daily fresh smaller articles your blog is ready to be exposed to the world. One of the best ways to find the right type of reader for your blog is to comment on other people's blogs. You should aim to comment on blogs focused on a similar niche topic to yours since the readers there will be more likely to be interested in your blog.


Most blog commenting systems allow you to have your name/title linked to your blog when you leave a comment. This is how people find your blog. If you are a prolific commentor and always have something valuable to say then people will be interested to read more of your work and hence click through to visit your blog.
 
6. Trackback and link to other blogs in your blog posts. A trackback is sort of like a blog conversation. When you write a new article to your blog and it links or references another blogger's article you can do a trackback to their entry. What this does is leave a truncated summary of your blog post on their blog entry - it's sort of like your blog telling someone else's blog that you wrote an article mentioning them. Trackbacks often appear like comments.


This is a good technique because like leaving comments a trackback leaves a link from another blog back to yours for readers to follow, but it also does something very important - it gets the attention of another blogger. The other blogger will likely come and read your post eager to see what you wrote about them. They may then become a loyal reader of yours or at least monitor you and if you are lucky some time down the road they may do a post linking to your blog bringing in more new readers.
 
5. Encourage comments on your own blog. One of the most powerful ways to convince someone to become a loyal reader is to show there are other loyal readers already following your work. If they see people commenting on your blog then they infer that your content must be good since you have readers so they should stick around and see what all the fuss is about. To encourage comments you can simply pose a question in a blog post. Be sure to always respond to comments as well so you can keep the conversation going.
 

4. Submit your latest pillar article to a blog carnival. A blog carnival is a post in a blog that summarizes a collection of articles from many different blogs on a specific topic. The idea is to collect some of the best content on a topic in a given week. Often many other blogs link back to a carnival host and as such the people that have articles featured in the carnival often enjoy a spike in new readers.
To find the right blog carnival for your blog, do a search at blogcarnival.com.
 

3. Submit your blog to blogtopsites.com. To be honest this tip is not going to bring in a flood of new readers but it's so easy to do and only takes five minutes so it's worth the effort. Go to Blog Top Sites, find the appropriate category for your blog and submit it. You have to copy and paste a couple of lines of code on to your blog so you can rank and then sit back and watch the traffic come in. You will probably only get 1-10 incoming readers per day with this technique but over time it can build up as you climb the rankings. It all helps!
 

2. Submit your articles to EzineArticles.com. This is another tip that doesn't bring in hundreds of new visitors immediately (although it can if you keep doing it) but it's worthwhile because you simply leverage what you already have - your pillar articles. Once a week or so take one of your pillar articles and submit it to Ezine Articles. Your article then becomes available to other people who can republish your article on their website or in their newsletter.


How you benefit is through what is called your 'Resource Box'. You create your own resource box which is like a signature file where you include one to two sentences and link back to your website (or blog in this case). Anyone who publishes your article has to include your resource box so you get incoming links. If someone with a large newsletter publishes your article you can get a lot of new readers at once.
 
1. Write more pillar articles. Everything you do above will help you to find blog readers however all of the techniques I've listed only work when you have strong pillars in place. Without them if you do everything above you may bring in readers but they won't stay or bother to come back. Aim for one solid pillar article per week and by the end of the year you will have a database of over 50 fantastic feature articles that will work hard for you to bring in more and more readers.


I hope you enjoyed my list of traffic tips. Everything listed above are techniques I've put into place myself for my blogs and have worked for me, however it's certainly not a comprehensive list. There are many more things you can do. Finding readers is all about testing to see what works best for you and your audience and I have no doubt if you put your mind to it you will find a balance that works for you.

This article was by Yaro Starak, a professional blogger and my blog mentor. He is the leader of the Blog Mastermind mentoring program designed to teach bloggers how to earn a full time income blogging part time.


To get more information about Blog Mastermind click this link:
www.BlogMastermind.com

Read More
Posted in Seo | No comments

Friday, December 11, 2009

Cara cepat update PageRank Google

Posted on 7:50 AM by Unknown
Cara cepat update PageRank Google: "Bagi anda yang mempunyai blog dan ingin cepat mendapatkan pagerank berikut tips Cara cepat update PageRank Google yaitu dengan cara penyebaran link menggunakan sistem Multi Level Marketing memanfaatkan kecepatan penyebaran dalam bentuk backlink.
Caranya gampang kok, yang perlu dilakukan adalah meletakkan link-link berikut ini di blog atau artikel Anda :
  1. SEO Tutorial
  2. Blog Dofollow
  3. Ilmu Belajar Komputer
  4. Download PC Media Terbaru
  5. Berita Artis Indonesia
  6. Body Health Information
  7. Share Free Tutorial
  8. Lerry060103
  9. Media Ilmu dan Sejarah
  10. AjarngeBloG Ayo BerbaGi

Tapi ingat, sebelum Anda meletakkan link diatas, hapus peserta nomor 1 dari daftar. Sehingga semua peserta naik 1 level. Yang tadi nomor 2 jadi nomor 1, nomor 3 jadi 2, dst. Kemudian masukkan link Anda sendiri di bagian paling bawah (nomor 10).
Jika tiap peserta mampu mengajak 5 orang saja, maka jumlah backlink yang akan didapat adalah
Ketika posisi kamu 10, jumlah backlink = 1

Posisi 9, jml backlink = 5
Posisi 8, jml backlink = 25
Posisi 7, jml backlink = 125
Posisi 6, jml backlink = 625
Posisi 5, jml backlink = 3,125
Posisi 4, jml backlink = 15,625
Posisi 3, jml backlink = 78,125
Posisi 2, jml backlink = 390,625
Posisi 1, jml backlink = 1,953,125

Dan semuanya menggunakan kata kunci yang kamu inginkan. Dari sisi SEO kamu sudah mendapatkan 1,953,125 backlink dan efek sampingnya jika pengunjung web para downline kamu mengklik link itu, juga membuat blog kamu mendapatkan traffik tambahan.
Nah, silahkan copy paste artikel ini, dan hilangkan peserta nomor 1 lalu tambahkan link blog/website kamu di posisi 10. Ingat, Anda harus mulai dari posisi 10 agar hasilnya maksimal. Karena jika kamu tiba2 di posisi 1, maka link kamu akan hilang begitu ada yang masuk ke posisi 10.
Selamat mencoba
Read More
Posted in Seo | No comments

Friday, October 23, 2009

Smooth Navigational Menu Vertical dan Horizon

Posted on 1:55 AM by Unknown
Hallo sobat saya menawarkan lagi model navigasi yang sekaligus Vertical dan Horizon agar sobat tidak perlu mencari-cari itu kalau cocok kalo gak cocok sobat comment aja, siapa tahu dapat wangsit lagi he..he..he.Tapi sebelumnya sobat click dulu demonya kalau cocok ya ambil kalo tidak skip aza.
1-Login ke blog anda
2-Layout
3-Edit
4-Letakkan code dibawah ini sebelum </head>
<script type="text/javascript" src="http://ajax.googleapis.com/ajax/libs/jquery/1.2.6/jquery.min.js"></script>
<script type="text/javascript" src="ddsmoothmenu.js">

/***********************************************************************************************************************
* Smooth Navigational Menu- (c) Dynamic Drive DHTML code library (www.dynamicdrive.com)
* This notice MUST stay intact for legal use
* Visit Dynamic Drive at http://www.mutiaramail.blogspot.com/ for full source code
************************************************************************************************************************/

</script>

<script type="text/javascript">

ddsmoothmenu.init({
mainmenuid: "smoothmenu1", //menu DIV id
orientation: 'h', //Horizontal or vertical menu: Set to "h" or "v"
classname: 'ddsmoothmenu', //class added to menu's outer DIV
//customtheme: ["#1c5a80", "#18374a"],
contentsource: "markup" //"markup" or ["container_id", "path_to_menu_file"]
})

ddsmoothmenu.init({
mainmenuid: "smoothmenu2", //Menu DIV id
orientation: 'v', //Horizontal or vertical menu: Set to "h" or "v"
classname: 'ddsmoothmenu-v', //class added to menu's outer DIV
//customtheme: ["#804000", "#482400"],
contentsource: "markup" //"markup" or ["container_id", "path_to_menu_file"]
})

</script>


Download


Horizon Navigation
5.1 Letakkan code dibawah ini sebelum ]]></b:skin>
.ddsmoothmenu{
font: bold 12px Verdana;
background: #414141; /*background of menu bar (default state)*/
width: 100%;
}

.ddsmoothmenu ul{
z-index:100;
margin: 0;
padding: 0;
list-style-type: none;
}

/*Top level list items*/
.ddsmoothmenu ul li{
position: relative;
display: inline;
float: left;
}

/*Top level menu link items style*/
.ddsmoothmenu ul li a{
display: block;
background: #414141; /*background of menu items (default state)*/
color: white;
padding: 8px 10px;
border-right: 1px solid #778;
color: #2d2b2b;
text-decoration: none;
}

* html .ddsmoothmenu ul li a{ /*IE6 hack to get sub menu links to behave correctly*/
display: inline-block;
}

.ddsmoothmenu ul li a:link, .ddsmoothmenu ul li a:visited{
color: white;
}

.ddsmoothmenu ul li a.selected{ /*CSS class that's dynamically added to the currently active menu items' LI A element*/
background: black;
color: white;
}

.ddsmoothmenu ul li a:hover{
background: black; /*background of menu items during onmouseover (hover state)*/
color: white;
}

/*1st sub level menu*/
.ddsmoothmenu ul li ul{
position: absolute;
left: 0;
display: none; /*collapse all sub menus to begin with*/
visibility: hidden;
}

/*Sub level menu list items (undo style from Top level List Items)*/
.ddsmoothmenu ul li ul li{
display: list-item;
float: none;
}

/*All subsequent sub menu levels vertical offset after 1st level sub menu */
.ddsmoothmenu ul li ul li ul{
top: 0;
}

/* Sub level menu links style */
.ddsmoothmenu ul li ul li a{
font: normal 13px Verdana;
width: 160px; /*width of sub menus*/
padding: 5px;
margin: 0;
border-top-width: 0;
border-bottom: 1px solid gray;
}

/* Holly Hack for IE \*/
* html .ddsmoothmenu{height: 1%;} /*Holly Hack for IE7 and below*/


/* ######### CSS classes applied to down and right arrow images ######### */

.downarrowclass{
position: absolute;
top: 12px;
right: 7px;
}

.rightarrowclass{
position: absolute;
top: 6px;
right: 5px;
}

/* ######### CSS for shadow added to sub menus ######### */

.ddshadow{
position: absolute;
left: 0;
top: 0;
width: 0;
height: 0;
background: silver;
}

.toplevelshadow{ /*shadow opacity. Doesn't work in IE*/
opacity: 0.8;
}

5.2 Letakkan code dibawah ini pada HTML
<div id="smoothmenu1" class="ddsmoothmenu">
<ul>
<li><a href="http://www.dynamicdrive.com">Item 1</a></li>
<li><a href="#">Folder 0</a>
<ul>
<li><a href="#">Sub Item 1.1</a></li>
<li><a href="#">Sub Item 1.2</a></li>
<li><a href="#">Sub Item 1.3</a></li>
<li><a href="#">Sub Item 1.4</a></li>
<li><a href="#">Sub Item 1.2</a></li>
<li><a href="#">Sub Item 1.3</a></li>
<li><a href="#">Sub Item 1.4</a></li>
</ul>
</li>
<li><a href="#">Folder 1</a>
<ul>
<li><a href="#">Sub Item 1.1</a></li>
<li><a href="#">Sub Item 1.2</a></li>
<li><a href="#">Sub Item 1.3</a></li>
<li><a href="#">Sub Item 1.4</a></li>
<li><a href="#">Sub Item 1.2</a></li>
<li><a href="#">Sub Item 1.3</a></li>
<li><a href="#">Sub Item 1.4</a></li>
</ul>
</li>
<li><a href="#">Item 3</a></li>
<li><a href="#">Folder 2</a>
<ul>
<li><a href="#">Sub Item 2.1</a></li>
<li><a href="#">Folder 2.1</a>
<ul>
<li><a href="#">Sub Item 2.1.1</a></li>
<li><a href="#">Sub Item 2.1.2</a></li>
<li><a href="#">Folder 3.1.1</a>
<ul>
<li><a href="#">Sub Item 3.1.1.1</a></li>
<li><a href="#">Sub Item 3.1.1.2</a></li>
<li><a href="#">Sub Item 3.1.1.3</a></li>
<li><a href="#">Sub Item 3.1.1.4</a></li>
<li><a href="#">Sub Item 3.1.1.5</a></li>
</ul>
</li>
<li><a href="#">Sub Item 2.1.4</a></li>
</ul>
</li>
</ul>
</li>
<li><a href="http://www.dynamicdrive.com/style/">Item 4</a></li>
</ul>
<br style="clear: left" />
</div>

Vertical Navigation
6.1 Letakkan code dibawah ini sebelum ]]></b:skin>
.ddsmoothmenu-v ul{
margin: 0;
padding: 0;
width: 170px; /* Main Menu Item widths */
list-style-type: none;
font: bold 12px Verdana;

border-bottom: 1px solid #ccc;
}

.ddsmoothmenu-v ul li{
position: relative;
}

/* Top level menu links style */
.ddsmoothmenu-v ul li a{
display: block;
overflow: auto; /*force hasLayout in IE7 */
color: white;
text-decoration: none;
padding: 6px;
border-bottom: 1px solid #778;
border-right: 1px solid #778;
}

.ddsmoothmenu-v ul li a:link, .ddsmoothmenu-v ul li a:visited, .ddsmoothmenu-v ul li a:active{
background: #414141; /*background of menu items (default state)*/
color: white;
}


.ddsmoothmenu-v ul li a.selected{ /*CSS class that's dynamically added to the currently active menu items' LI A element*/
background: black;
color: white;
}

.ddsmoothmenu-v ul li a:hover{
background: black; /*background of menu items during onmouseover (hover state)*/
color: white;
}

/*Sub level menu items */
.ddsmoothmenu-v ul li ul{
position: absolute;
width: 170px; /*Sub Menu Items width */
top: 0;
font-weight: normal;
visibility: hidden;
}


/* Holly Hack for IE \*/
* html .ddsmoothmenu-v ul li { float: left; height: 1%; }
* html .ddsmoothmenu-v ul li a { height: 1%; }
/* End */

6.2 Letakkan code dibawah ini pada HTML
<div id="smoothmenu2" class="ddsmoothmenu-v">
<ul>
<li><a href="http://www.dynamicdrive.com">Item 1</a></li>
<li><a href="#">Folder 0</a>
<ul>
<li><a href="#">Sub Item 1.1</a></li>
<li><a href="#">Sub Item 1.2</a></li>
<li><a href="#">Sub Item 1.3</a></li>
<li><a href="#">Sub Item 1.4</a></li>
<li><a href="#">Sub Item 1.2</a></li>
<li><a href="#">Sub Item 1.3</a></li>
<li><a href="#">Sub Item 1.4</a></li>
</ul>
</li>
<li><a href="#">Folder 1</a>
<ul>
<li><a href="#">Sub Item 1.1</a></li>
<li><a href="#">Sub Item 1.2</a></li>
<li><a href="#">Sub Item 1.3</a></li>
<li><a href="#">Sub Item 1.4</a></li>
<li><a href="#">Sub Item 1.2</a></li>
<li><a href="#">Sub Item 1.3</a></li>
<li><a href="#">Sub Item 1.4</a></li>
</ul>
</li>
<li><a href="#">Item 3</a></li>
<li><a href="#">Folder 2</a>
<ul>
<li><a href="#">Sub Item 2.1</a></li>
<li><a href="#">Folder 2.1</a>
<ul>
<li><a href="#">Sub Item 2.1.1</a></li>
<li><a href="#">Sub Item 2.1.2</a></li>
<li><a href="#">Folder 3.1.1</a>
<ul>
<li><a href="#">Sub Item 3.1.1.1</a></li>
<li><a href="#">Sub Item 3.1.1.2</a></li>
<li><a href="#">Sub Item 3.1.1.3</a></li>
<li><a href="#">Sub Item 3.1.1.4</a></li>
<li><a href="#">Sub Item 3.1.1.5</a></li>
</ul>
</li>
<li><a href="#">Sub Item 2.1.4</a></li>
</ul>
</li>
</ul>
</li>
<li><a href="http://www.dynamicdrive.com/style/">Item 4</a></li>
</ul>
<br style="clear: left" />
</div>

Selamat mencoba dan semoga mimpi indah
Read More
Posted in Navigation | No comments

Thursday, October 15, 2009

jQuery Image Magnify

Posted on 11:53 PM by Unknown
Hallo sobat yang budiman,saya ada trick atau tips buat sobat, yaa siapa tahu dibutuhkan, bukankah kita saling berkunjung dan saling memberi informasi? Tidak tertutup kemungkinan bila sobat ada ide bisa sharing, yaa agar Blogar Indonesia tambah caeem.Ok tidak banyak basa basi, saya mulai dengan contohnya.

1-Login ke account blogger anda.
2-Click Layout--->
3-Click Edit
4-Letakkan code dibawah ini sebelum </head>;
<script src='http://ajax.googleapis.com/ajax/libs/jquery/1.3.2/jquery.min.js' type='text/javascript'/>
<script src='jquery.magnifier.js' type='text/javascript'>
/***********************************************************************************
* jQuery Image Magnify http://www.mutiaramail.blogspot.com
***********************************************************************************/
</script>


Download

5-Letakkan kode dibawah ini sebelum kode ini ]]></b:skin>
dsettings: {
magnifyby: 3, //default increase factor of enlarged image
duration: 500, //default duration of animation, in millisec
mgopacity: 0.2 //opacify of original image when enlarged image overlays it
},
cursorcss: 'url(magnify.cur), -moz-zoom-in', //Value for CSS's 'cursor' attribute, added to original image


6-Lalu postingkan code dibawah ini di content sobat:
<img src="http://i721.photobucket.com/albums/ww218/sugwi/Grape.jpg" class="magnify" style="width: 250px; height: 75px;" />
7-Selesei, selamat mencoba dan semoga mimpi bidadari he..he..he..

Note:
-Ganti code yang berwarna Biru
-Rubahlah code yang berwarna merah sesuai kebutuhan sobat.
Read More
Posted in Tips, Trick | No comments

Tuesday, October 6, 2009

Hidden Image atau popupBox

Posted on 12:15 AM by Unknown
Hallo sobat yang budiman saya ada tips sekaligus trick he..he..Hal ini saya posting sebab kelihatannya sobat membutuhkan kelebihannya adalah : Mengirit postingan anda yaa terlihat ringakas gitu dech.Ok kita mulai aja ya .....Contohnya seperti dibawah ini:
Click demo Mutiaramail

1-Login ke account blogger anda.
2-Click Layout--->
3-Click Edit
4-Kemudian copy code dibawah ini letakkan sebelum </head>
<script src='popupBox.js' type='text/javascript'/>

Download

5-Postingkan code dibawah ini pada postingan sobat atau letakkan pada gadget anda :
<a href="http://www.mutiaramail.blogspot.com" onclick="return show_hide_box(this,800,600,'2px dotted')"><blink>Click demo Mutiaramail</blink></a><div align="center"></div>
Note:
Gantilah code yang berwarna biru

6-Pekerjaan anda selesai. Selamat mencoba dan semoga mimpi indah.
Read More
Posted in Tips, Trick | No comments

Wednesday, September 30, 2009

Cara membuat Pop-Up Window

Posted on 4:05 AM by Unknown
Teman-teman pernah mendengar bahkan mungkin familiar dengan pop-up window. Ok begini saya ada tips buat anda. Cara sangat mudah yaitu
1-Login ke account blogger anda.
2-Click Layout--->
3-Add a gadget
4-Kemudian copy code dibawah ini, sebelumnya .... ganti dulu code yang berwarna biru :
<FORM METHOD="post">

<INPUT TYPE="button" VALUE="Click me!"

OnClick = "hint_wnd = window.open(
'', 'hint_wnd', 'width=50, height=60, resizable=no, scrollbars=no' );

hint_wnd.document.write( 'Tulis text anda disini' );
return true;">

</FORM>

Semoga berhasil dan mimipi indah
Read More
Posted in Tips, Trick | No comments

Monday, September 28, 2009

Cara memasang Text Kedap kedip-rainbow.js

Posted on 9:22 PM by Unknown
Bagaimanakah cara memasang text berkedap-kedip ?.Ingin tahu caranya ?Kalo ingin contoh sudah banyak rekan-rekan yang pakai trick ini bahkan saya juga memakainya
caranya gampang yaitu :
1-Login ke account blogger anda.
2-Backup Template anda--->click--><span style="font-weight: bold; color: rgb(255, 204, 0);">Download Full Template</span>
3-Click Layout--->
4-Click Edit HTML--->
5-Download kode dibawah ini dan upload ke hosting anda :
6-Ganti code dibawah ini yang berwana biru dengan code JS yang sudah anda upload di hosting:
Download

<script src='rainbow.js'/>
7-Kemudian copy pasta pada HTML anda sesudah </head> lalu simpan atau anda bisa pakai script saya yang sudah saya upload pada hosting saya, code telah tersedia dibawah ini :
<script src='http://sites.google.com/site/sugwijays/sugwi.js'/>
Semoga anda menyukainya.
Read More
Posted in Tips, Trick | No comments

Friday, September 25, 2009

Highlight untuk Text Area

Posted on 2:02 AM by Unknown
Ada variasi lain dari membuat text area ini, yakni text area dengan menggunakan tombol highlight. dengan adanya tombol highlight ini akan memudahkan bagi para pengunjung untuk mengcopy seluruh text ataupun kode-kode yang di berikan, karena dengan hanya sekali tekan saja pada tombol highlight tadi, maka seluruh text ataupun kode-kode yang ada di dalamnya akan di highlight dan tinggal di copy saja. Fasilitas ini sangat berguna tatkala text ataupun kode-kode yang di berikan dalan jumlah yang sangat banyak dan ini akan mengurangi resiko tertinggalnya suatu text ataupun kode-kode untuk di copy. Untuk membuat text area dengan menggunakan highlight ini silahkan anda copy kode HTML di bawah :
<div><form name="copy"><div align="center"><input onclick="javascript:this.form.txt.focus();this.form.txt.select();" type="button" value="Highlight All"> </div><div align="center"></div><p align="center"><textarea style="WIDTH: 300px; HEIGHT: 144px" name="txt" rows="100" wrap="VIRTUAL" cols="55"><a href="http://www.mutiaramail.blogspot.com" target="_blank">Mutiaramail</a></textarea></p></div></form>
Hasilnya seperti dibawah ini :


Selamat mencoba semoga berhasil.
Read More
Posted in Tips, Trick | No comments

Wednesday, September 23, 2009

Cara Menampilkan warna background dengan postingan yang berbeda

Posted on 7:03 PM by Unknown
Dalam membuat background ada dua alternatif yaitu membuat background dengan warna dan membuat background dengan bantuan gambar, khusus untuk background dengan gambar terbagi lagi ke dalam beberapa teknik yaitu background gambar dengan teknik repeat (ada repeat, repeat-x, repeat-y) dan background gambar dengan teknik no-repeat (gambar backgroundnya memang ukuran besar). Untuk teknik-teknik ini mungkin lain kali saja deh, kangrohman nya sedikit bad mood nih, mending sekarang yang singkat aja deh.
Membuat background dengan warna
Agar warna background postingan bisa berbeda-beda setiap postingan, anda perlu melakukan :
Ketika anda akan memulai untuk membuat postingan, pilih tab Edit HTML jangan pilih Compose. Awali postingan anda dengan kode seperti ini :
<div style="background:#FFECB3; text-align:justify;font-size:120%"></div>
Ganti tulisan kode_warna_disini dengan kode warna yang anda inginkan. Sedikit tips yang masih bingung dengan kode warna,klick disini
Contoh seperti dibawah ini :

<div style="background:#FFECB3; text-align:justify; font-size:120%">
This is an enjoyable movie and rightly billed as Rocky for a new generation. I must say the music, and cinematography people will instantly recognise the Rocky references, even without being told that this is being billed as Rocky for a new generation.
It stars Channing Tatum(Step up to the streets) as a former college wrestler Shawn McArthur struggling hard to make ends meet in New York after having an altercation with his father/coach of the wrestling team. We meet him as he is struggling to offload a series of books he has no idea are counterfeit, one of the hapless buyers happens to be the gorgeous Zulay Valez (Zulay Henao, S. Darko something about her just reminds me of a cat), from the altercation that occurs with Harvey Boarden(Terrence Howard, Iron man) and some of his associates, Harvey gets the impression Shawn may indeed be just what he is looking for, for an underground fighting campaign, the rates of pay of course are several times more than either of them could make struggling to survive on the unforgiving metropolis that is New York.
Although billed as Rocky for the next generation, there are some testing questions the original Rocky would not have crossed his mind to contemplate, and of course there is the familiar territory of the arch nemesis of a protagonist, the talented wrestler Evan Hailey (Brian J. White The Shield) who happens to have been the catalyst for the original fallout with Shawn's father, as equally Harvey as Shawn's unofficial manager has to face some of the taunts from his comrades who are rolling in the money, notably Martinez (Luiz Guzman, Traffic) Jack Dancing (Roger Guenver Smith, He got game).
You are left wondering if Shawn is going to make it as a underground fighter, and if there is any romantic hope for him and the lovely Zulay equally struggling herself to raise a child on her own, and her troubling grandmother.
</div>
Menjadi seperti ini :

This is an enjoyable movie and rightly billed as Rocky for a new generation. I must say the music, and cinematography people will instantly recognise the Rocky references, even without being told that this is being billed as Rocky for a new generation.
It stars Channing Tatum(Step up to the streets) as a former college wrestler Shawn McArthur struggling hard to make ends meet in New York after having an altercation with his father/coach of the wrestling team. We meet him as he is struggling to offload a series of books he has no idea are counterfeit, one of the hapless buyers happens to be the gorgeous Zulay Valez (Zulay Henao, S. Darko something about her just reminds me of a cat), from the altercation that occurs with Harvey Boarden(Terrence Howard, Iron man) and some of his associates, Harvey gets the impression Shawn may indeed be just what he is looking for, for an underground fighting campaign, the rates of pay of course are several times more than either of them could make struggling to survive on the unforgiving metropolis that is New York.
Although billed as Rocky for the next generation, there are some testing questions the original Rocky would not have crossed his mind to contemplate, and of course there is the familiar territory of the arch nemesis of a protagonist, the talented wrestler Evan Hailey (Brian J. White The Shield) who happens to have been the catalyst for the original fallout with Shawn's father, as equally Harvey as Shawn's unofficial manager has to face some of the taunts from his comrades who are rolling in the money, notably Martinez (Luiz Guzman, Traffic) Jack Dancing (Roger Guenver Smith, He got game).
You are left wondering if Shawn is going to make it as a underground fighter, and if there is any romantic hope for him and the lovely Zulay equally struggling herself to raise a child on her own, and her troubling grandmother.
Read More
Posted in Tips, Trick | No comments

Wednesday, September 16, 2009

Menghilangkan nomor label pada Blogspot

Posted on 9:04 PM by Unknown
Setiap Blogger menginginkan kelihatan blognya lebih kelihatan bagus atau kata lain profesional.Oke kita mulai saja yaa ....

1-Login ke account blogger anda.
2-Backup Template anda--->click-->Download Full Template
3-Click Layout--->
4-Click Edit HTML--->
5-Click Expand Widget templates
6-Cari code dibawah ini :
(<data:label.count/>)
Kemudian "HAPUS/DELETE"
7-Simpan
Read More
Posted in Tips, Trick | No comments

Tuesday, September 15, 2009

Accessories From Mutiara-Mail pada Blog

Posted on 8:43 PM by Unknown
Selamat bertemu lagi pada postingan saya hasil dari jalan-jalan, tips ini sengaja saya posting pada blog saya, siapa tahu teman juga membutuhkan tips ini.Contohnya gambar bergerak ada dibawah ini,yaa .. seperti yang saya pasang pada blog saya ini:
Gambar 1Gambar 2Gambar 3
1-Login ke account blogger anda.
2-Click Layout--->
3-Click Edit HTML--->
4-Letakkan code dibawah ini sebelum </body>
<a href='http://mutiaramail.blogspot.com' style='display:scroll;position: fixed; bottom:5px;left:5px;' title='Blog Invest'><img src='http://i721.photobucket.com/albums/ww218/sugwi/DRUIDD.gif'/></a>
Catatan:
Kode yang berwarna merah ganti bottom atau up
Kode yang berwarna merah ganti left atau right
5-Selesai
Read More
Posted in Tips, Trick, Tutor | No comments

Monday, September 14, 2009

Membuat 3-tiga colom pada kaki template

Posted on 3:37 AM by Unknown
Mungkin sobat pernah memakai template yang mana template tersebut tidak ada tiga kolom pada kaki template lihat seperti conto dibawah ini :

1-Log in ke account blogger anda.
2-Click Layout--->
3-Click Edit HTML
4-Check list pada ->Tapi sebelumnya Backup dulu Template Anda
5-Cari kode yang berwarna biru
<div id='footer-wrapper'>
<b:section class='footer' id='footer'/>
</div>

Perhatian !!!:
Perlu sobat ketahui tidak semua template bisa dijadikan 3 tiga kolom misalnya "footer-wrap" or "footer".
6-Bila tidak ada masalah maka ganti kode yang berwarna merah dengan kode dibawah ini:
<div id='footer-column-container'>
<div id='footer2' style='width: 30%; float: left; margin:0; text-align: left;'>

</div>
<div id='footer3' style='width: 40%; float: left; margin:0; text-align: left;'>

</div>
<div id='footer4' style='width: 30%; float: right; margin:0; text-align: left;'>

</div>
<div style='clear:both;'/>
<p>
<hr align='center' color='#5d5d54' width='90%'/></p>
<div id='footer-bottom' style='text-align: center; padding: 10px; text-transform: lowercase;'>
<b:section class='footer' id='col-bottom' preferred='yes'>
<b:widget id='Text2' locked='false' title='' type='Text'/>
</b:section>
</div>
<div style='clear:both;'/>
</div>

Setelah itu simpan dan apabila sobat menginginkan warna yang sesuai dengan tempat sobat maka ganti kode yang berwarna merah.
7-Kemudian step yang terakhir letakkan kode dibawah ini sebelum ]]></b:skin> tag
#footer-column-container {
clear:both;
}

.footer-column {
padding: 10px;
}

8-Tahan berikut simpan dan selesai semoga anda berhasil
Read More
Posted in Tips, Trick | No comments

Wednesday, September 9, 2009

Navigasi CSS Horizontal hover menu

Posted on 1:52 AM by Unknown
Hi sobat saya datang kembali membawa tip Navigation buat anda.Contoh sepeerti ini

1-Log in ke account blogger anda.
2-Click Layout--->
3-Click Edit HTML
4-Letakkan kode dibawah ini sebelum ]]></b:skin> tag :
.hovermenu ul{
font: bold 13px arial;
padding-left: 0;
margin-left: 0;
height: 20px;
}

.hovermenu ul li{
list-style: none;
display: inline;
}

.hovermenu ul li a{
padding: 2px 0.5em;
text-decoration: none;
float: left;
color: black;
background-color: #FFF2BF;
border: 2px solid #FFF2BF;
}

.hovermenu ul li a:hover{
background-color: #FFE271;
border-style: outset;
}

html>body .hovermenu ul li a:active{ /* Apply mousedown effect only to NON IE browsers */
border-style: inset;
}

5-Letakkan kode dibawah ini pada HTML anda
<div class='hovermenu'>
<ul>
<li><a href='http://www.mutiaramail.blogspot.com'>Mutiaramail</a></li>
<li><a href='#http://Edit Link'>Edit Link</a></li>
</ul>
</div>

6-Simpan dan selesai
Read More
Posted in Navigation, Tips, Trick | No comments

Blogger Tips jQuery Scroll to Top Control

Posted on 12:01 AM by Unknown
Hi friend, saya ada trick buat anda, khususnya buat blogger pemula yaitu Scroll top. Ok kita mualai saja ya ......
1-Login ke account blogger anda---->
2-Click Layout--->
3-Click Edit HTML---->
4-Copy kode dibawah ini kemudian letakkan diatas </head> :
<script type="text/javascript" src="http://ajax.googleapis.com/ajax/libs/jquery/1.3.2/jquery.min.js"></script>
<script type="text/javascript" src="scrolltopcontrol.js">
/***********************************************
* Followt http://mutiaramail.blogspot.com for full source code
***********************************************/
</script>

5-Letakkan kode berikut ini diatas </body>:
<a href="#top"><img src="#http://Up.gif"></a>
6-Download js dan image-nya
Download

7-Selesai dan selamat mencoba semoga berhasil.
Read More
Posted in Cara Pasang, Tips, Trick | No comments

Sunday, September 6, 2009

Trick Tips memasang Bookmark

Posted on 10:01 PM by Unknown
Setiap pemilik blog tentunya, berkeinginan agar blognya lebih baik dan lebih menarik daripada blog lain.Nah saya ada tips buat anda.sebelumya klik disini lalu tambahkan "Get Your Button" Lihat contoh seperti dibawah ini :
Selanjutnya ---->
1-Login ke account blogger anda---->
2-Click Layout--->
3-Click Edit HTML---->
4.cari kode dibawah ini :
<div class='post-footer'>

atau

<p class='post-footer-line post-footer-line-1'>
Jika anda masih tidak menemukannya maka coba cari kode yang sejenis seperti diatas. Kemudian pastekan kode yang didapat dari "Get Your Button" dibawahnya.
<p class='post-footer-line post-footer-line-3'><br/><div align='left'><a expr:href='"http://www.addthis.com/bookmark.php?pub=4QVQQ2TM5XDPAYVN&url=" + data:post.url + "&title=" + data:post.title' target='_blank' title='Bookmark using any bookmark manager!'><img alt='AddThis Social Bookmark Button' height='16' src='http://s5.addthis.com/button1-bm.gif' style='border: 0px; padding: 0px' width='125'/></a></div><!-- AddThis Bookmark Post Button END --></p>
Setelah itu anda akan bisa melihat bookmark anda pada setiap postingan.
Ada model yang lain selain diatas
klik disini lalu tambahkan "Get Your Button" Lihat contoh seperti dibawah ini :
Selanjutnya ---->
1-Login ke account blogger anda---->
2-Click Layout--->
3-Click Edit HTML---->
4.cari kode dibawah ini :
<data:post.body/>
Jika anda masih tidak menemukannya maka coba cari kode yang sejenis seperti diatas.
<b:if cond='data:blog.pageType == "item"'>

<script
type='text/javascript'>digg_url=&quot;<data:post.url/>&quot;;</script><script
src='http://digg.com/tools/diggthis.js' type='text/javascript'/>

<a
expr:href='&quot;http://www.stumbleupon.com/submit?url=&quot; +
data:post.url + &quot;&amp;title=&quot; + data:post.title'
rel='external nofollow' target='_blank'><img alt='Stumble' src='ganti Icon URL '/></a>

<a expr:href='&quot;http://del.icio.us/post?url=&quot; +
data:post.url + &quot;&amp;title=&quot; + data:post.title'
rel='external nofollow' target='_blank'><img alt='Delicious' src='gantiIcon URL '/></a>

<a expr:href='&quot;http://technorati.com/faves?add=&quot; +
data:post.url' rel='external nofollow' target='_blank'><img
alt='Technorati' src='ganti Icon URL '/></a>

<a expr:href='&quot;http://twitthis.com/twit?url=&quot; +
data:post.url' rel='external nofollow' target='_blank'><img
alt='Twitter' src='ganti Icon URL '/></a>

<a
expr:href='&quot;http://www.facebook.com/sharer.php?u=&quot; +
data:post.url + &quot;&amp;t=&quot; + data:post.title'
rel='external nofollow' target='_blank'><img alt='Facebook' src='ganti Icon URL '/></a></b:if>

Perlu anda ketahui bahwa kode yang berwarna biru harus diganti, caranya yaitu ganti icon dengan klik disini kemudain down dan simpan pada hosting anda.
Selamat mencoba dan semoga sukses.
Read More
Posted in Tips, Trick | No comments

Thursday, September 3, 2009

Trick Hidden sebagian content

Posted on 11:32 PM by Unknown
Apa itu jQuery? Dari situsnya “jQuery adalah sejenis pustaka JavaScript yang baru. jQuery adalah pustaka JavaScript yang cepat dan ringkas yang menyederhanakan traversing dokumen HTML, penanganan event, animasi, dan interaksi Ajax untuk mempercepat pengembangan web”. Mari kita liat contoh sederhana ini bagi penggunaan jQuery:
Klik di sini untuk menimbulkan atau menyembunyikan

The important thing to remember is that all vacations are of a very personal nature. The perfect holiday for one person might sound like a complete nightmare to someone else.
You'll want to book something that's right for you and your family. Have a good think about what this would entail and maybe even draw up a list of the key features that you're looking for.
This can actually be really good fun and it's well worth getting the kids involved. Even if they just tell you that they'd like somewhere with a beach, then it gives you a good start!.

Caranya seperti ini:
1-Login ke account blogger anda---->
2-Click Layout--->
3-Click Edit HTML---->
4-Simpan kode dibawah ini diatas ]]></b:skin>
$(document).ready( function() {
$("#toggle-hidden-div").click( function() {
$("#hidden-div").slideToggle('slow');
});
});

5-Simpan kode ini diatas </Head>
<script src="http://gedex.web.id/wp-content/jquery/jquery.js" type="text/javascript"></script>
<script type="text/javascript">
$(document).ready( function() {
$("#toggle-hidden-div").click( function() {
$("#hidden-div").slideToggle('slow');
});
});
</script>

6-Copy kode dibawah ini dan Simpan di konten anda
<a id="toggle-hidden-div" href="#toggle-hidden-div">Klik di sini untuk menimbulkan atau menyembunyikan</a>
<div id="hidden-div" style="display: none">
Tulis konten ada disini?
</div>

6-Selesai
Read More
Posted in Tips, Trick | No comments

Trick Dropline Menus

Posted on 8:52 PM by Unknown
Friend dah lama nih gak posting akhirnya kangen juga posting.Saya ada tips buat anda ikuti aja stepnya.

1-Login ke account blogger anda.
2-Click Layout--->
3-Click Edit HTML
4-Letakkan kode dibawah ini sebelum ]]></b:skin> tag :
/* ================================================================
This copyright notice must be kept untouched in the stylesheet at
all times.
The original version of this stylesheet and the associated html
is available at http://www.sumbloggers.com.
Follow the instruction to make this menu on mutiaramail.blogspot.com
=================================================================== */
#nav {
height:36px; position:relative; font-family:arial, verdana, sans-serif; font-size:11px;z-index:500;
}
#nav .select {
margin:0; padding:0; list-style:none; white-space:nowrap;
}
#nav li {
float:left; background:url(blank_over_p.gif);
}
#nav .select a {
display:block; height:36px; float:left; background: url(blank_p.gif); padding:0 0 0 15px; text-decoration:none; line-height:25px; white-space:nowrap; color:#ddd;
}
#nav .select a b {
display:block; padding:0 30px 10px 15px; background:url(blank_p.gif) right top;
}
#nav .select li:hover a {
background: url(blank_over_p.gif); padding:0 0 0 15px; line-height:27px; cursor:pointer; color:#fff;
}
#nav .select li:hover a b {
display:block; padding:0 30px 9px 15px; background:url(blank_over_p.gif) right top; cursor:pointer;
}
#nav .sub {
display:none; margin:0; padding:0 0 0 60px;list-style:none;
}
#nav .sub li {background:transparent;}
#nav .select li:hover .sub {
height:18px; display:block; position:absolute; float:left; width:750px; top:28px; left:0; text-align:center;
}
#nav .select li:hover .sub li a {
display:block;height:18px; line-height:16px; float:left; background:transparent url(transparent.gif); padding:0 16px; margin:0; white-space:nowrap; border:1px solid #000; border-color:#888 #777 #666 #ddd; color:#888;font-size:10px;
}
#nav .select li:hover .sub li a:hover {
color:#000; background:#e8e8e8; border-color: #fff #333 #000 #fff; line-height:15px;
}

5-Letakkan kode dibawah ini sebelum </head> tag:
<script src="stuHover.js" type="text/javascript"></script>
6-Letakkan kode dibawah ini pada HTML anda :
<div id='nav'>
<ul class='select'><li><a href='#'><b>Home</b></a></li>
<li><a href='#'><b>Joseph Turner</b></a>
<ul class='sub'>
<li><a href='#'>Fishermen at Sea</a></li>
<li><a href='#'>The Shipwreck</a></li>
<li><a href='#'>The Vale of Ashburnham</a></li>
<li><a href='#'>Crossing the Brook</a></li>
</ul>
</li>
<li><a href='#'><b>John Constable</b></a>
<ul class='sub'>
<li><a href='#'>The Hay Wain</a></li>
<li><a href='#'>Brighton Beach</a></li>
<li><a href='#'>Malvern Hall</a></li>
<li><a href='#'>Salisbury Cathedral</a></li>
<li><a href='#'>Weymouth Bay</a></li>
</ul>
</li>
<li><a href='#'><b>Henri Matisse</b></a>
<ul class='sub'>
<li><a href='#'>The Girl with Green Eyes</a></li>
<li><a href='#'>The Dream</a></li>
<li><a href='#'>Woman in Blue</a></li>
<li><a href='#'>The Yellow Dress</a></li>
<li><a href='#'>The Piano Lesson</a></li>
</ul>
</li>
<li><a href='#'><b>Mutiaramail</b></a>
<ul class='sub'>
<li><a href='http://mutiaramail.blogspot.com/2008/12/about-me.html'>About Mutiaramail</a></li>
<li><a href='http://mutiaramail.blogspot.com'>Need for help</a></li>
<li><a href='http://sumbloggers.blogspot.com'>Blog Invest</a></li>
<li><a href='http://mutiaramail.blogspot.com'>Css Menu</a></li>
<li><a href='http://mutiaramail.blogspot.com'>How to make this menu?</a></li>
</ul>
</li>
</ul>
</div>

7-Download perlengkapannya jangan lupa ganti kode yang berwarna biru.
Download
Read More
Posted in Cara Pasang, Navigation, Tips, Trick | No comments

Monday, August 31, 2009

Tips Membuat Navigasi Vertical

Posted on 9:41 PM by Unknown
Hai sobat yang budiman saya menyediakan bagi para pencari navigasi Vertical, kita langsung saja.Et Contohnya kaya ini:

1-Login ke account blogger anda.
2-Click Layout---->EDIT HTML,Jangan lupa beri tanda centang pada kotak EXPAND WIDGET sebelumnya anda backup dulu template sobat klik Download Template Lengkap lalu simpat pada folder anda.
3-Copy pastekan script di bawah ini tepat diatas kode </head>;
<script type="text/javascript" src="http://ajax.googleapis.com/ajax/libs/jquery/1.3.2/jquery.min.js"></script>
<script type="text/javascript" src="ddaccordion.js">
/***********************************************
* Follow www.mutiaramail.blogspot.com)
***********************************************/
</script>

<script type="text/javascript">
ddaccordion.init({
headerclass: "headerbar", //Shared CSS class name of headers group
contentclass: "submenu", //Shared CSS class name of contents group
revealtype: "mouseover", //Reveal content when user clicks or onmouseover the header? Valid value: "click", "clickgo", or "mouseover"
mouseoverdelay: 200, //if revealtype="mouseover", set delay in milliseconds before header expands onMouseover
collapseprev: true, //Collapse previous content (so only one open at any time)? true/false
defaultexpanded: [0], //index of content(s) open by default [index1, index2, etc] [] denotes no content
onemustopen: true, //Specify whether at least one header should be open always (so never all headers closed)
animatedefault: false, //Should contents open by default be animated into view?
persiststate: true, //persist state of opened contents within browser session?
toggleclass: ["", "selected"], //Two CSS classes to be applied to the header when it's collapsed and expanded, respectively ["class1", "class2"]
togglehtml: ["", "", ""], //Additional HTML added to the header when it's collapsed and expanded, respectively ["position", "html1", "html2"] (see docs)
animatespeed: "normal", //speed of animation: integer in milliseconds (ie: 200), or keywords "fast", "normal", or "slow"
oninit:function(headers, expandedindices){ //custom code to run when headers have initalized
//do nothing
},
onopenclose:function(header, index, state, isuseractivated){ //custom code to run whenever a header is opened or closed
//do nothing
}
})

</script>

4. Kemudian Simpan kode dibawah ini sebelum ]]></b:skin>
.urbangreymenu{
width: 190px; /*width of menu*/
}

.urbangreymenu .headerbar{
font: bold 13px Verdana;
color: white;
background: #606060 url(arrowstop.gif) no-repeat 8px 6px; /*last 2 values are the x and y coordinates of bullet image*/
margin-bottom: 0; /*bottom spacing between header and rest of content*/
text-transform: uppercase;
padding: 7px 0 7px 31px; /*31px is left indentation of header text*/
}

.urbangreymenu .headerbar a{
text-decoration: none;
color: white;
display: block;
}

.urbangreymenu ul{
list-style-type: none;
margin: 0;
padding: 0;
margin-bottom: 0; /*bottom spacing between each UL and rest of content*/
}

.urbangreymenu ul li{
padding-bottom: 2px; /*bottom spacing between menu items*/
}

.urbangreymenu ul li a{
font: normal 12px Arial;
color: black;
background: #E9E9E9;
display: block;
padding: 5px 0;
line-height: 17px;
padding-left: 8px; /*link text is indented 8px*/
text-decoration: none;
}

.urbangreymenu ul li a:visited{
color: black;
}

.urbangreymenu ul li a:hover{ /*hover state CSS*/
color: white;
background: black;
}

5. Simpan kode dibawah ini pada HTML Anda
<div class="urbangreymenu">
<h3 class="headerbar"><a href="http://www.mutiaramail.blogspot.com">Blog Kita</a></h3>
<ul class="submenu">
<li><a href="http://www.mutiaramail.blogspot.com">Mutiaramail</a></li>
<li><a href="http://www.sumbloggers.blogspot.com">Blog Invest</a></li>
<li><a href="http://blogger-trade-online.blogspot.com">Harga Saham</a></li>
<li><a href="#">Edit</a></li>
<li><a href="#">Edit&lt;/a></li>
<li><a href="#">Edit</a></li>
</ul>

<h3 class="headerbar"><a href="#">Edit&lt;/a></h3>
<ul class="submenu">
<li><a href="#">Edit</a></li>
</ul>

</div>

6. Terakhir ganti kode yang berwarna biru dan anda bisa download JS dibawah ini :

Download
Read More
Posted in Navigation, Tips, Trick | No comments

Postingan terlihat di Sidebar

Posted on 2:32 AM by Unknown
Anda menginginkan postingan anda terlihat atau terkontrol sidebar anda? Pasanglah kode sibawah ini, carannya :
1-Log in ke account blogger anda.
2-Click Layout--->
3-Tambahkan Gadget, sebelumnya ganti kode yang berwarna biru dengan nama blog anda kemudian pastekan script dibawah ini:
<script
src="http://fun4utips.googlepages.com/recentpostSidebar.js"></script> <script>var numposts = 10;
var showpostdate = false; var showpostsummary = false; var numchars =
100; </script>
<script src="http://YOURBLOGNAME.blogspot.com/feeds/posts/default?orderby=published&amp;alt=json-in-script&amp;callback=rp">
</script>

4.Simpan dan selesei
Read More
Posted in Tips, Trick | No comments

Drop down menu button untuk Blog Anda

Posted on 1:25 AM by Unknown
Hallo Saya ada tips setelah jalan-jalan yang sangat melelahkan, kita langsung praktek aja.
1-Log in ke account blogger anda.
2-Click Layout--->
3-Tambahkan Gadget, kemudian pastekan script dibawah ini:
<form name="Menu">
<select name="menu">
<option value="http://mutiaramail.blogspot.com">Mutiara Info</a>
<option value="http://www.yahoo.com">Yahoo!</a>
<option value="http://www.google.com">Google</a>
</select>
<input type="button" onClick="top.location=document.Menu.menu.options[document.Menu.menu.selectedIndex].value;" value="GO!">
</form>

4.Lalu simpan
5.Selesei
Read More
Posted in Tips, Trick | No comments

Friday, August 28, 2009

Menghilangkan Navbar (Navigation Bar)

Posted on 5:19 AM by Unknown
Navbar adalah fasilitas yang dimiliki oleh Blogger/blogspot, bentuknya berupa kotak kecil memanjang kesamping yang letaknya berada di bagian paling atas dari blog yang fungsinya antara lain untuk mulai melakukan Sign In/out atau bisa juga membuat Blog baru. Navigation Bar juga bisa digunakan untuk melaporkan kecurangan atau tindak kejahatan weblog yang dilakukan oleh seorang blogger, misalnya kontent blognya yang melanggar TOS atau hal-hal yang dianggap merugikan orang lain.

Namun ada beberapa blogger yang merasa akan lebih enak jika melihat tampilan blognya dalam keadaan bersih tanpa harus ada bagian mencolok di bagian atas blognya sendiri (NavBar). Karena itu, kadang para blogger menghapus NavBar tersebut. Pertanyaannya adalah: Apa tidak melanggar Term of Service (TOS) dari Blogger.com?
Sejauh ini, banyak blogger yang telah menghilangkan Navbar mereka dan tidak juga mendapat teguran dari blogger. Artinya, bisa dilakukan. Toh di TOS Blogger sendiri juga tidak ada aturan yang cukup detail tentang hal ini.

Nah, bagaimana menghilangkan Navigation Bar?
Ada beberapa penyedia template yang memang sudah tidak ada NavBar-nya. Namun bagi kamu yang memakai template yang masih ada NavBarnya dan ingin menghilangkannya maka inilah caranya.

1. Sobat harus Login dulu di Blogger.com / Blogspot.com
2. Trus Pilih Layout --> Edit HTML
3. Copy script berikut ke dalam tag head
#navbar-iframe {
display: none !important;
}

contohnya sebagai berikut :
-----------------------------------------------
Blogger Template Style
Name: JUST NEWS
Designer: NewWpThemes.com
URL: http://newwpthemes.com/wordpress-theme/just-news/
Date: 15 AGO 2009
Updated by: Dhampire
----------------------------------------------- */
#navbar-iframe {
display: none !important;
}

/* Variable definitions
====================

4. Kemudian simpan.

Selamat Mencoba.....!!
Read More
Posted in Tips, Trick | No comments

Thursday, August 20, 2009

3subs-Menu

Posted on 2:51 AM by Unknown
Hallo sobat yang budiman, kalo kita membicarakan masalah trick atau tips tidak akan ada habisnya. Nah ini saya punya salah satu macam Navigasi buat sobat.Contohnya seperti ini :

1-Log in ke account blogger anda.
2-Click Layout---->EDIT HTML,Jangan lupa beri tanda centang pada kotak EXPAND WIDGET sebelumnya anda backup dulu template sobat klik Download Template Lengkap lalu simpan pada folder anda.
3-Copy pastekan script di bawah ini sebelum kode ]]></b:skin> tag:
.jqueryslidemenu{
font: bold 12px Verdana;
background: #414141;
width: 100%;
}
.jqueryslidemenu ul{
margin: 0;
padding: 0;
list-style-type: none;
}

/*Top level list items*/
.jqueryslidemenu ul li{
position: relative;
display: inline;
float: left;
}
/*Top level menu link items style*/
.jqueryslidemenu ul li a{
display: block;
background: #414141; /*background of tabs (default state)*/
color: white;
padding: 8px 10px;
border-right: 1px solid #778;
color: #2d2b2b;
text-decoration: none;
}
* html .jqueryslidemenu ul li a{ /*IE6 hack to get sub menu links to behave correctly*/
display: inline-block;
}
.jqueryslidemenu ul li a:link, .jqueryslidemenu ul li a:visited{
color: white;
}
.jqueryslidemenu ul li a:hover{
background: black; /*tab link background during hover state*/
color: white;
}
/*1st sub level menu*/
.jqueryslidemenu ul li ul{
position: absolute;
left: 0;
display: block;
visibility: hidden;
}
/*Sub level menu list items (undo style from Top level List Items)*/
.jqueryslidemenu ul li ul li{
display: list-item;
float: none;
}
/*All subsequent sub menu levels vertical offset after 1st level sub menu */
.jqueryslidemenu ul li ul li ul{
top: 0;
}
/* Sub level menu links style */
.jqueryslidemenu ul li ul li a{
font: normal 13px Verdana;
width: 160px; /*width of sub menus*/
padding: 5px;
margin: 0;
border-top-width: 0;
border-bottom: 1px solid gray;
}
.jqueryslidemenuz ul li ul li a:hover{ /*sub menus hover style*/
background: #eff9ff;
color: black;
}
/* ######### CSS classes applied to down and right arrow images ######### */
.downarrowclass{
position: absolute;
top: 12px;
right: 7px;
}
.rightarrowclass{
position: absolute;
top: 6px;
right: 5px;
}

2.Tambah kode dibawah ini sebelum </head> tag:
<script src="http://jqueryjs.googlecode.com/files/jquery-1.3.2.min.js" type="text/javascript"></script>
<script type="text/javascript" src="http://yourhost.menu.js"></script>
<!--[if lte IE 7]>
<style type="text/css">
html .jqueryslidemenu{height: 1%;} /*Holly Hack for IE7 and below*/
</style>
<![endif]-->


Download

Upload menu.js file ke hosting seperti (110mb.com,hotlinkfiles.com...)
kemudian pastekan ke kode yang berwarna biru.
3.Simpan kode dibawah ini kemudian letakkan pada HTML/Javscript, anda:
<div id="myslidemenu" class="jqueryslidemenu">
<ul>
<li><a href="http://mutiaramail.blogspot.com">Mutiaramail</a></li>
<li><a href="#">Item 2</a></li>
<li><a href="#">Folder 1</a>
<ul>
<li><a href="#">Sub Item 1.1</a></li>
<li><a href="#">Sub Item 1.2</a></li>
<li><a href="#">Sub Item 1.3</a></li>
<li><a href="#">Sub Item 1.4</a></li>
</ul>
</li>
<li><a href="#">Item 3</a></li>
<li><a href="#">Folder 2</a>
<ul>
<li><a href="#">Sub Item 2.1</a></li>
<li><a href="#">Folder 2.1</a>
<ul>
<li><a href="#">Sub Item 2.1.1</a></li>
<li><a href="#">Sub Item 2.1.2</a></li>
<li><a href="#">Folder 3.1.1</a>
<ul>
<li><a href="#">Sub Item 3.1.1.1</a></li>
<li><a href="#">Sub Item 3.1.1.2</a></li>
<li><a href="#">Sub Item 3.1.1.3</a></li>
<li><a href="#">Sub Item 3.1.1.4</a></li>
<li><a href="#">Sub Item 3.1.1.5</a></li>
</ul>
</li>
<li><a href="#">Sub Item 2.1.4</a></li>
</ul>
</li>
</ul>
</li>
<li><a href="http://mutiaramail.blogspot.com">Make This Menu</a></li>
<li><a href="http://sumbloggers.blogspot.com">Blog Invest</a></li>
</ul>
<br style="clear: left"/>
</div>

Selamat mencoba dan Semoga berhasil.
Read More
Posted in Cara Pasang, Navigation, Tips, Trick, Tutor | No comments

Tuesday, August 11, 2009

Slide-In Menu

Posted on 4:48 AM by Unknown
Apa kabar saya datang lagi guna membagi tips buat anda para blogger yang budiman tidak usah basa basi ini contohnya:

Langkah Pertama :
1-Log in ke account blogger anda.
2-Click Lay Out---->EDIT HTML,Jangan lupa beri tanda centang pada kotak EXPAND WIDGET sebelumnya anda backup dulu template sobat klik Download Template Lengkap lalu simpat pada folder anda.
3-Cari kode didalam template anda,letaknya di bagian atas.
4-Copy pastekan script di bawah ini tepat diatas kode </head>;
<style type="text/css">
<!--
A.ssmItems:link {color:black;text-decoration:none;}
A.ssmItems:hover {color:black;text-decoration:none;}
A.ssmItems:active {color:black;text-decoration:none;}
A.ssmItems:visited {color:black;text-decoration:none;}
//-->
</style>
<SCRIPT SRC="ssm.js" language="JavaScript1.2">
//Dynamic-FX slide in menu v6.5 (By maXimus, http://maximus.ravecore.com/)
//Updated July 8th, 03' for doctype bug
//For full source, and 100's more DHTML scripts, visit http://www.dynamicdrive.com
</SCRIPT>
<SCRIPT SRC="ssmItems.js" language="JavaScript1.2"></SCRIPT>


Ganti Kode yang berwarna biru sesuai dengan kebutuhan, kemudian Copy paste kode dibawah kedalam notepad lalu save as ke "js"
<!--
/*
Configure menu styles below
NOTE: To edit the link colors, go to the STYLE tags and edit the ssm2Items colors
*/
YOffset=150; // no quotes!!
XOffset=0;
staticYOffset=30; // no quotes!!
slideSpeed=20 // no quotes!!
waitTime=100; // no quotes!! this sets the time the menu stays out for after the mouse goes off it.
menuBGColor="black";
menuIsStatic="yes"; //this sets whether menu should stay static on the screen
menuWidth=150; // Must be a multiple of 10! no quotes!!
menuCols=2;
hdrFontFamily="verdana";
hdrFontSize="2";
hdrFontColor="white";
hdrBGColor="#170088";
hdrAlign="left";
hdrVAlign="center";
hdrHeight="15";
linkFontFamily="Verdana";
linkFontSize="2";
linkBGColor="white";
linkOverBGColor="#FFFF99";
linkTarget="_top";
linkAlign="Left";
barBGColor="#444444";
barFontFamily="Verdana";
barFontSize="2";
barFontColor="white";
barVAlign="center";
barWidth=20; // no quotes!!
barText="SIDE MENU"; // <IMG> tag supported. Put exact html for an image to show.
///////////////////////////
// ssmItems[...]=[name, link, target, colspan, endrow?] - leave 'link' and 'target' blank to make a header
ssmItems[0]=["Menu"] //create header
ssmItems[1]=["Mutiaramail", "http://mutiaramail.blogspot.com", ""]
ssmItems[2]=["Edit", "Edit",""]
ssmItems[3]=["Edit", "Edit",""]
ssmItems[4]=["Edit", "Edit",""]
ssmItems[5]=["Edit", "Edit",""]
ssmItems[6]=["Edit", "Edit",""]
ssmItems[7]=["Edit", "Edit/faqs.htm", "", 1, "no"] //create two column row
ssmItems[8]=["Edit", "Edit/contact.htm", "",1]
ssmItems[9]=["Edit", "", ""] //create header
ssmItems[10]=["Edit", "Edit",""]
ssmItems[11]=["Edit", "Edit",""]
ssmItems[12]=["Edit", "Edit",""]
buildMenu();
//-->

Kemudian Download ssm.js dibawah ini:

Download
Read More
Posted in Cara Pasang, Tips, Trick, Tutor | No comments

Monday, August 10, 2009

New Navigation

Posted on 9:55 PM by Unknown
Hallo kawan saya ada Navigasi buat anda, mudah-mudahan anda menyukainya, oke kita mulai saja.
Letakkan code dibawah ini ditas </head>
<script type="text/javascript" src="http://ajax.googleapis.com/ajax/libs/jquery/1.3.2/jquery.min.js"></script>
<link rel="stylesheet" type="text/css" href="jkmegamenu.css" />
<script type="text/javascript" src="jkmegamenu.js">
/***********************************************
* jQuery Mega Menu- by JavaScript Kit (www.javascriptkit.com)
* This notice must stay intact for usage
* follow http://mutiaramail.blogspot.com
* Visit JavaScript Kit at http://www.javascriptkit.com/ for full source code
***********************************************/
</script>
<script type="text/javascript">
//jkmegamenu.definemenu("anchorid", "menuid", "mouseover|click")
jkmegamenu.definemenu("megaanchor", "megamenu1", "mouseover")
</script>

Kemudian Letakkan kode dibawah ini pada HTML anda
<!--Mega Menu Anchor-->
<a href="http://www.javascriptkit.com" id="megaanchor">Tech Links</a>
<!--Mega Drop Down Menu HTML. Retain given CSS classes-->
<div id="megamenu1" class="megamenu">
<div class="column">
<h3>Web Development</h3>
<ul>
<li><a href="http://www.mutiaramail.blogspot.com">Mutiaramail</a></li>
<li><a href="http://www.sumbloggers.blogspot.com/">Bloginvest</a></li>
<li><a href="Link 1">Link 1</a></li>
<li><a href="Link 2">Link 2</a></li>
<li><a href="Link 3">Link 3</a></li>
</ul>
</div>

<div class="column">
<h3>News Related</h3>
<ul>
<li><a href="http://www.cnn.com/">CNN</a></li>
<li><a href="http://www.msnbc.com">MSNBC</a></li>
<li><a href="http://www.google.com">Google</a></li>
<li><a href="http://news.bbc.co.uk">BBC News</a></li>
</ul>
</div>

<div class="column">
<h3>Technology</h3>
<ul>
<li><a href="http://www.news.com/">News.com</a></li>
<li><a href="http://www.slashdot.com">SlashDot</a></li>
<li><a href="http://www.digg.com">Digg</a></li>
<li><a href="http://www.techcrunch.com">Tech Crunch</a></li>
</ul>
</div>

<br style="clear: left" /> <!--Break after 3rd column. Move this if desired-->

<div class="column">
<h3>Web Development</h3>
<ul>
<li><a href="http://mutiaramail.blogspot.com">JavaScript Kit</a></li>
<li><a href="http://mutiaramail.blogspot.com/">Dynamic Drive</a></li>
<li><a href="http://mutiaramail.blogspot.com">CSS Drive</a></li>
<li><a href="http://mutiaramail.blogspot.com">Coding Forums</a></li>
<li><a href="http://mutiaramail.blogspot.com/">DOM Reference</a></li>
</ul>
</div>

<div class="column">
<h3>News Related</h3>
<ul>
<li><a href="http://www.cnn.com/">CNN</a></li>
<li><a href="http://www.msnbc.com">MSNBC</a></li>
<li><a href="http://www.google.com">Google</a></li>
<li><a href="http://news.bbc.co.uk">BBC News</a></li>
</ul>
</div>

<div class="column">
<h3>Technology</h3>
<ul>
<li><a href="http://www.news.com/">News.com</a></li>
<li><a href="http://www.slashdot.com">SlashDot</a></li>
<li><a href="http://www.digg.com">Digg</a></li>
<li><a href="http://www.techcrunch.com">Tech Crunch</a></li>
</ul>
</div>
</div>

Download

Selamat mencoba dan semoga anda sukses.
Read More
Posted in Cara Pasang, Navigation, Tips, Trick, Tutor | No comments

Create a Jquery box

Posted on 5:07 AM by Unknown

Hallo setelah saya jala2 saya mendapatkan trik untuk blog anda, intinya insyallah anda suka.Saya tidak bisa berpanjang kata, kita coba aja ya.Ikuti aja petunjuk didalam kotak.
1.Letakkan kode dibawa ini pada template, sebelum the </head> tag:
<script src="http://jqueryjs.googlecode.com/files/jquery-1.3.2.min.js" type="text/javascript"></script>
<script type="text/javascript">$(function(){$("#butToggle").click(function(){$('#dvt').toggle(1000);});});</script>

2.Kemudian, letakkan kode CSS sebelum </body> tag :

#dvt{width: 200px;height: 100px;border: solid 1px black;background-color:LightGrey;text-align:center; display:none;}

3.Pamungkas ,buat HTML/JavaScript kemudian postingkan kode atau teks :
<div id="dvt">Postingkan kode anda dan Teks anda disini...</div>
<button id="butToggle">Spread</button>


Anda bisa lihat hasilnya anda suka? Lakukan sesuai petunjuk semoga anda berhasil

Read More
Posted in Cara Pasang, Tips, Trick, Tutor | No comments

Circling text trail

Posted on 1:40 AM by Unknown
Agar blog tampak tampak menarik saya ada tips buat sobat yaitu kursor yang berbentuk text yang melingkar yangmana text tadi mengikuti kusor bergerak.Lebih jelasnya anda coba sendiri :
Pharsekan kode berikut ini di sini setelah itu ganti huruf yang berwarna biru sesuai dengan kebutuhan sobat pastekan sebelum </head>
<style type="text/css">
/* Circle Text Styles */
#outerCircleText {
/* Optional - DO NOT SET FONT-SIZE HERE, SET IT IN THE SCRIPT */
font-style: italic;
font-weight: bold;
font-family: 'comic sans ms', verdana, arial;
color: #000;
/* End Optional */

/* Start Required - Do Not Edit */
position: absolute;top: 0;left: 0;z-index: 3000;cursor: default;}
#outerCircleText div {position: relative;}
#outerCircleText div div {position: absolute;top: 0;left: 0;text-align: center;}
/* End Required */
/* End Circle Text Styles */
</style>
<script type="text/javascript">

/* Circling text trail- Tim Tilton
Website: http://www.tempermedia.com/
Visit: http://www.dynamicdrive.com/ for Original Source and tons of scripts
Modified Here for more flexibility and modern browser support
Modifications as first seen in http://www.dynamicdrive.com/forums/
username:jscheuer1 - This notice must remain for legal use
*/

;(function(){

// Your message here (QUOTED STRING)
var msg = "Mutiaramail Mutiara Info";

/* THE REST OF THE EDITABLE VALUES BELOW ARE ALL UNQUOTED NUMBERS */

// Set font's style size for calculating dimensions
// Set to number of desired pixels font size (decimal and negative numbers not allowed)
var size = 24;

// Set both to 1 for plain circle, set one of them to 2 for oval
// Other numbers & decimals can have interesting effects, keep these low (0 to 3)
var circleY = 0.75; var circleX = 2;

// The larger this divisor, the smaller the spaces between letters
// (decimals allowed, not negative numbers)
var letter_spacing = 5;

// The larger this multiplier, the bigger the circle/oval
// (decimals allowed, not negative numbers, some rounding is applied)
var diameter = 10;

// Rotation speed, set it negative if you want it to spin clockwise (decimals allowed)
var rotation = 0.4;

// This is not the rotation speed, its the reaction speed, keep low!
// Set this to 1 or a decimal less than one (decimals allowed, not negative numbers)
var speed = 0.3;

////////////////////// Stop Editing //////////////////////

if (!window.addEventListener && !window.attachEvent || !document.createElement) return;

msg = msg.split('');
var n = msg.length - 1, a = Math.round(size * diameter * 0.208333), currStep = 20,
ymouse = a * circleY + 20, xmouse = a * circleX + 20, y = [], x = [], Y = [], X = [],
o = document.createElement('div'), oi = document.createElement('div'),
b = document.compatMode && document.compatMode != "BackCompat"? document.documentElement : document.body,

mouse = function(e){
e = e || window.event;
ymouse = !isNaN(e.pageY)? e.pageY : e.clientY; // y-position
xmouse = !isNaN(e.pageX)? e.pageX : e.clientX; // x-position
},

makecircle = function(){ // rotation/positioning
if(init.nopy){
o.style.top = (b || document.body).scrollTop + 'px';
o.style.left = (b || document.body).scrollLeft + 'px';
};
currStep -= rotation;
for (var d, i = n; i > -1; --i){ // makes the circle
d = document.getElementById('iemsg' + i).style;
d.top = Math.round(y[i] + a * Math.sin((currStep + i) / letter_spacing) * circleY - 15) + 'px';
d.left = Math.round(x[i] + a * Math.cos((currStep + i) / letter_spacing) * circleX) + 'px';
};
},

drag = function(){ // makes the resistance
y[0] = Y[0] += (ymouse - Y[0]) * speed;
x[0] = X[0] += (xmouse - 20 - X[0]) * speed;
for (var i = n; i > 0; --i){
y[i] = Y[i] += (y[i-1] - Y[i]) * speed;
x[i] = X[i] += (x[i-1] - X[i]) * speed;
};
makecircle();
},

init = function(){ // appends message divs, & sets initial values for positioning arrays
if(!isNaN(window.pageYOffset)){
ymouse += window.pageYOffset;
xmouse += window.pageXOffset;
} else init.nopy = true;
for (var d, i = n; i > -1; --i){
d = document.createElement('div'); d.id = 'iemsg' + i;
d.style.height = d.style.width = a + 'px';
d.appendChild(document.createTextNode(msg[i]));
oi.appendChild(d); y[i] = x[i] = Y[i] = X[i] = 0;
};
o.appendChild(oi); document.body.appendChild(o);
setInterval(drag, 25);
},

ascroll = function(){
ymouse += window.pageYOffset;
xmouse += window.pageXOffset;
window.removeEventListener('scroll', ascroll, false);
};

o.id = 'outerCircleText'; o.style.fontSize = size + 'px';

if (window.addEventListener){
window.addEventListener('load', init, false);
document.addEventListener('mouseover', mouse, false);
document.addEventListener('mousemove', mouse, false);
if (/Apple/.test(navigator.vendor))
window.addEventListener('scroll', ascroll, false);
}
else if (window.attachEvent){
window.attachEvent('onload', init);
document.attachEvent('onmousemove', mouse);
};

})();

</script>

Selamat mencoba dan semoga berhasil.
Read More
Posted in Cara Pasang, Tips, Trick, Tutor | No comments

Cara Buat Tab Menu Versi 1 Di Blogspot

Posted on 12:02 AM by Unknown
Waktu lalu saya lagi jalan-jalan eh ada bahan untuk ngeblog yaitu TAB MENU,salah saru cara untuk menghemat space pada pada tlemplate anda. Bagaimana cara memasang pada template anda?Coba perhatikan dengan santai,berikut ini cuplikannya :
Langkah Pertama :
1-Log in ke account blogger anda.
2-Click Lay Out---->EDIT HTML,Jangan lupa beri tanda centang pada kotak EXPAND WIDGET sebelumnya anda backup dulu template sobat klik Download Template Lengkap lalu simpat pada folder anda.
3-Cari kode didalam template anda,letaknya di bagian atas.
4-Copy pastekan script di bawah ini tepat diatas kode </head>;
<script src=' http://www.hotlinkfiles.com/files/2734091_rgx15/tab_menu1.js' type='text/javascript'/>
Perhatian :
-Ganti Direct Link File JS yang saya tulis dengan warna biru dengan Direct link anda sendiri, agar tidak terjadi over load penggunaan bandwith.

Download

Setelah anda download up load file js tersebut ke account anda sendiri Baca Disini !!.
5-Jika sudah selesai cari lagi kode ]]> di dalam template anda.
6-Kemudian copy pastekan script di bawah ini tepat diatas kode ]]> .


div.TabView div.Tabs { width: 100%; overflow: hidden; border-bottom: 0px solid #000000; font: bold 13px Arial; list-style-type: none; }
div.TabView div.Tabs a { float: left; display: block; text-decoration: none; margin-right: 2px; margin-bottom: 2px; padding: 3px 3px 3px 3px; color: #FFFFFF; background: #0B615E; }
div.TabView div.Tabs a:hover { color: #000000; background:#DF0101; }
div.TabView div.Tabs a.Active { color: #000000; background:#2E2EFE; }
div.TabView div.Pages { width: 100%; overflow: hidden; clear: both; border: 0px solid #E6E6E6; margin: 25px 0px 5px 5px; padding: 0px 0px 0px 0px; }
div.TabView div.Pages div.Page { height: 100%; padding: 0px; overflow: hidden; }
div.TabView div.Pages div.Page div.Pad { padding: 0px 0px; }


Catatan: Kode yang saya tandai dengan warna hijau adalah kode warna yang bisa anda ganti dengan warna favorite anda untuk kode warna lihat di akhir artikel ini.
7-Jika sudah selesai klik save.

Langkah Kedua :
1-Log in ke account blogger anda.
2-Click Lay out--->ADD GADGET--->HTML/JAVA SCRIPT.
3-Copy pastekan script di bawah ini kedalam kolom new gadget tadi pada posisi EDIT HTML jangan pada posisi COMPOSE/menulis.
<div style="overflow:auto; width:100%px; height:100%px; padding:5px 5px 5px 5px; border:1px solid #a4e11e;">

<form action="tabview.html" method="get">
<div id="TabView" class="TabView">
<div style="width: 100%;" class="Tabs">
<a>Judul Tombol Tab 1</a>
<a>Judul Tombol Tab 2</a>
<a>Judul Tombol Tab 3</a>
<a>Judul Tombol Tab 4</a>
</div>
<div style="width: 100%; height: 300px;" class="Pages">

<div class="Page">
<div class="Pad">

Isikan Menu Anda Disini Sesuai Dengan Judul "Tombol Tab 1" disini ! Tulisan ini jgn ikut di kopi!!

</div>
</div>


<div class="Page">
<div class="Pad">


Isikan Menu Anda Disini Sesuai Dengan Judul "Tombol Tab 2" disini ! Tulisan ini jgn ikut di kopi!!

</div>
</div>


<div class="Page">
<div class="Pad">


Isikan Menu Anda Disini Sesuai Dengan Judul "Tombol Tab 3" disini ! Tulisan ini jgn ikut di kopi!!

</div>
</div>


<div class="Page">
<div class="Pad">


Isikan Menu Anda Disini Sesuai Dengan Judul "Tombol Tab 4" disini ! Tulisan ini jgn ikut di kopi!!

</div>
</div>

</div>
</div>
</form>
<script type="text/javascript">
tabview_initialize('TabView');
</script>
</div>

Keterangan :
-Kode a4e11e yg warna hijau adalah kode warna border.
-Ganti tulisan JUDUL TOMBOL TAB 1,2,3 dan 4 dengan judul anda sendiri misalnya untuk tab 1 judulnya free template dan tombol ke 2 ruang chat dan seterusnya, sesuai menu anda sendiri.
-Angka 300 yang warna hijau adalah ukuran tinggi dari kotak TAB MENU,ganti dengan ukuran anda sendiri.
-Tulisan yg warna biru Isikan Menu Anda Disini Sesuai Dengan Judul "Tombol Tab 1,2,3 dan 4 adalah ruang untuk anda memasang menu anda bisa banner,widget gambar dan sebagainya.
5-Jika sudah selesai klik save.
Selamat mencoba dan semoga berhasil
Read More
Posted in Cara Pasang, Tips, Trick, Tutor | No comments
Newer Posts Older Posts Home
Subscribe to: Posts (Atom)

Popular Posts

  • Spiderman Shattered Dimensions - RELOADED
    Spiderman Shattered Dimensions - RELOADED | 8.17 Gb Genre: Action Game Type : ISO Release Date: Q4 2010 Here we have a new action,adventu...
  • How and Why verify your site?
    Privacy is important to Google, which is why Google Webmaster Tools asks you to prove you own a site before showing you stats and data abou...
  • 5 Reasons to Blog Anonymously (and 5 Reasons Not To)
    This guest post is by Phil (not his real name) of somehighschoolblog . It used to be impossible to run a business anonymously. Sure, some au...
  • Would Google Adsense Ever Ban You?
    Adsense publishing is such a lucrative business for so many webmasters. It is a business with a simple strategical approach; you make money ...
  • Free Hosting under Google and free failed
    Do you want to host your external java script files in unlimited bandwidth? If you host your files on google code you can do for free. This ...
  • Free download TeamViewer Manager 5.1.904
    TeamViewer Manager 5.1.904 | 17 MB An optional database tool that stores your partner details in a database that can also be shared over ...
  • 8 Tips To Decrease Your Blog’s Bounce Rate
    Bounce rate is a term used by Google Analytics ; it refers to visitors who land on your blog and leave without going to any other page. The ...
  • Fasting (Saum)
    Every year in the month of Ramadan, all Muslims fast from first light until sundown, abstaining from food, drink, and sexual relations. Thos...
  • Hands on, Swipe finger on the Nokia N9 screen
    Nokia recently introduced the N9 at Nokia Connection 2011 event. Here it is Nokia's first smartphone with MeeGo operating system . What...
  • Expert Hard Drive Recovery After Reformatting
    Computers are equipment that also can suffer crashes from wear and tear. Over long-term use, computers can crash on their own. In fact, 44% ...

Categories

  • .Net
  • .NET 3.5
  • .Net Tools
  • About Adsense
  • Agile
  • ALT.NET
  • Anti-Virus
  • Article
  • ASP.NET MVC
  • C# 3
  • Cara Pasang
  • CI Factory
  • Computer
  • Continuous Integration
  • Courseware
  • DI/IOC
  • Download Games
  • Download Karaoke
  • Download software
  • Download template
  • Download Template
  • Exchange Link
  • Google
  • Hadits Nabi
  • Hiring
  • IEEE
  • IIS 7
  • Info electronic
  • Lambda
  • Lean
  • Linux
  • MbUnit
  • Messages
  • MS Exchange 2003
  • Mutiara
  • Navigation
  • News
  • NHibernate
  • NxtGenUG
  • Other
  • Practices and Patterns
  • Qurdist
  • Resharper
  • Scrum
  • Security
  • Seo
  • Small Business Server
  • SQL Server 2008
  • Testing
  • TFS
  • Tips
  • Trick
  • Tutor
  • Ubuntu
  • UML
  • Verifying
  • Virtual Instrument
  • Virtual PC
  • Virtual Server
  • Visual Studio 2010
  • wcf
  • Web
  • Windsor

Blog Archive

  • ►  2012 (1)
    • ►  August (1)
  • ►  2011 (71)
    • ►  July (1)
    • ►  June (43)
    • ►  May (20)
    • ►  April (5)
    • ►  March (2)
  • ►  2010 (113)
    • ►  December (22)
    • ►  November (4)
    • ►  September (8)
    • ►  July (7)
    • ►  May (3)
    • ►  April (11)
    • ►  March (35)
    • ►  February (5)
    • ►  January (18)
  • ▼  2009 (143)
    • ▼  December (3)
      • Cara Pasang Kotak Komentar Dibawah Postingan
      • 10 Blog Traffic Tips
      • Cara cepat update PageRank Google
    • ►  October (3)
      • Smooth Navigational Menu Vertical dan Horizon
      • jQuery Image Magnify
      • Hidden Image atau popupBox
    • ►  September (12)
      • Cara membuat Pop-Up Window
      • Cara memasang Text Kedap kedip-rainbow.js
      • Highlight untuk Text Area
      • Cara Menampilkan warna background dengan postingan...
      • Menghilangkan nomor label pada Blogspot
      • Accessories From Mutiara-Mail pada Blog
      • Membuat 3-tiga colom pada kaki template
      • Navigasi CSS Horizontal hover menu
      • Blogger Tips jQuery Scroll to Top Control
      • Trick Tips memasang Bookmark
      • Trick Hidden sebagian content
      • Trick Dropline Menus
    • ►  August (14)
      • Tips Membuat Navigasi Vertical
      • Postingan terlihat di Sidebar
      • Drop down menu button untuk Blog Anda
      • Menghilangkan Navbar (Navigation Bar)
      • 3subs-Menu
      • Slide-In Menu
      • New Navigation
      • Create a Jquery box
      • Circling text trail
      • Cara Buat Tab Menu Versi 1 Di Blogspot
    • ►  July (23)
    • ►  June (1)
    • ►  May (18)
    • ►  April (23)
    • ►  March (36)
    • ►  February (5)
    • ►  January (5)
  • ►  2008 (30)
    • ►  December (1)
    • ►  November (4)
    • ►  October (2)
    • ►  September (5)
    • ►  August (5)
    • ►  July (3)
    • ►  June (6)
    • ►  May (2)
    • ►  April (1)
    • ►  March (1)
Powered by Blogger.

About Me

Unknown
View my complete profile